
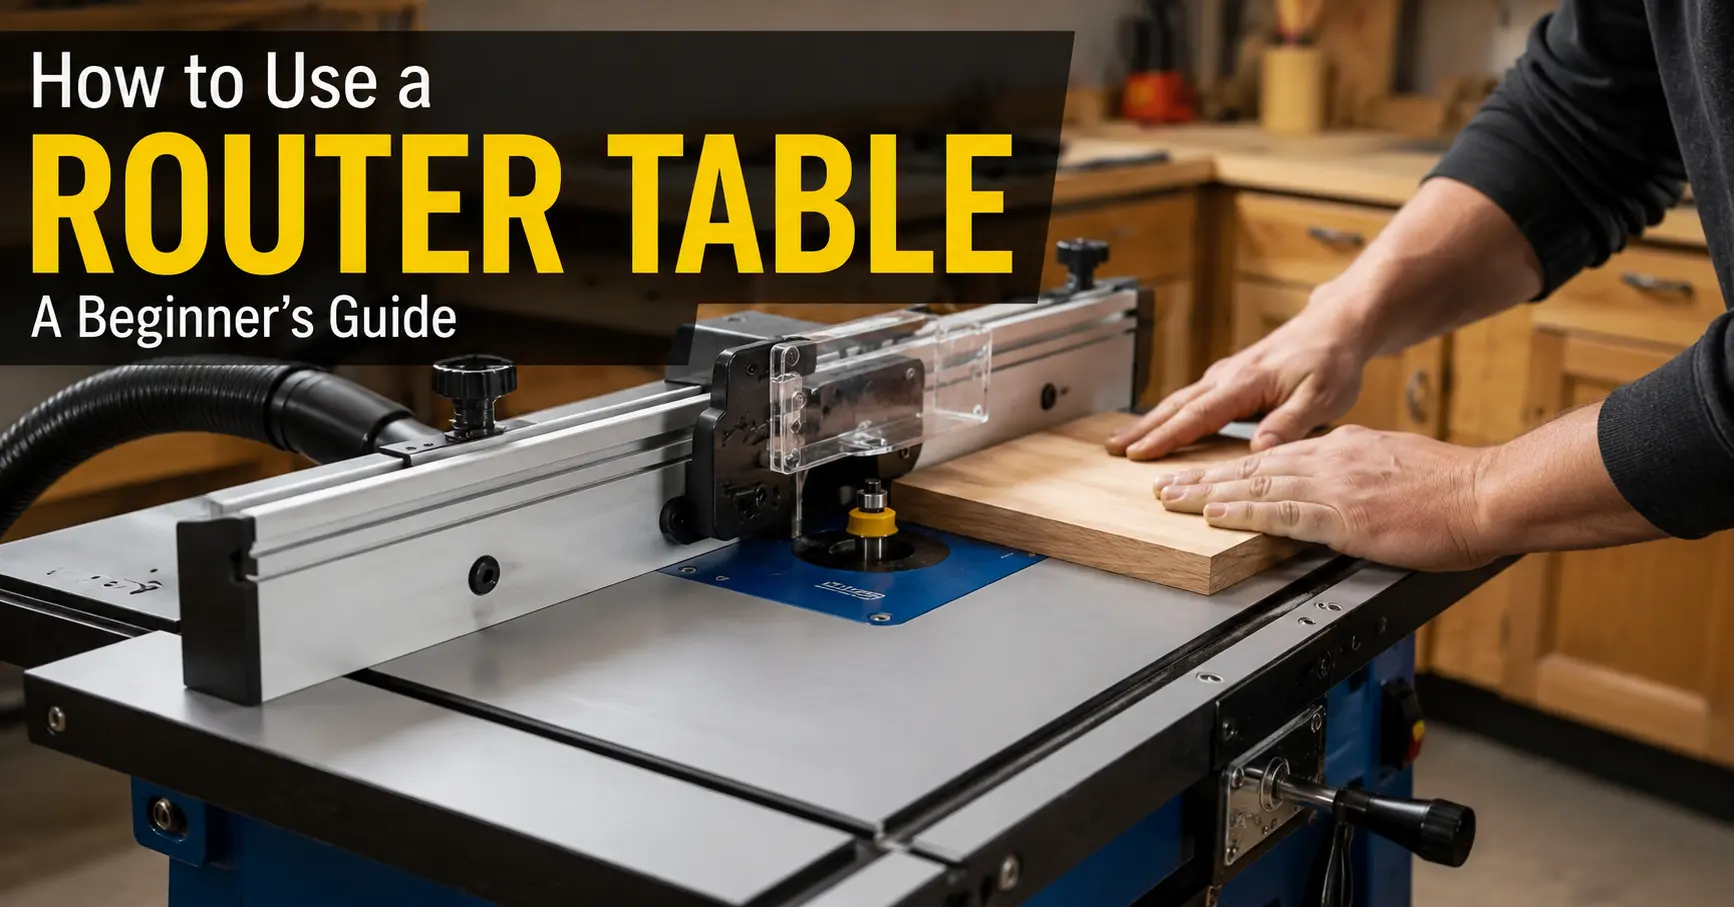
If you’ve been staring at a router table — wondering what it does, how it works, or whether you’ll cut off a finger the first time you use one — this guide is written specifically for you. We’ll walk through how to use a router table from the ground up: what the machine actually is, how to set it up safely, which router bits to use, how to make different types of cuts, and the pro tips that most beginners never hear about.
By the end of this article, you’ll be using a router table with confidence — and probably wondering why you waited so long to try it.
What Is a Router Table?
A router table is a stationary woodworking tool that mounts a router upside-down beneath a flat, stable table surface — with the spinning bit protruding up through a hole in the center. Instead of moving the router over your workpiece (as you do with a handheld router), you move the wood across the table and through the bit.
This seemingly simple flip changes everything. When you use a router table, you gain two hands to guide the wood, a fence to control the cut width precisely, and the full weight and stability of the table itself to keep things consistent. The result: cleaner cuts, more repeatable results, and far better control than a handheld router gives you.
Quick Definition
A router table inverts your router so the bit faces up. You feed wood across the table into the bit — rather than guiding the router across the wood. This gives you dramatically more control and precision.
What Can You Do With a Router Table?
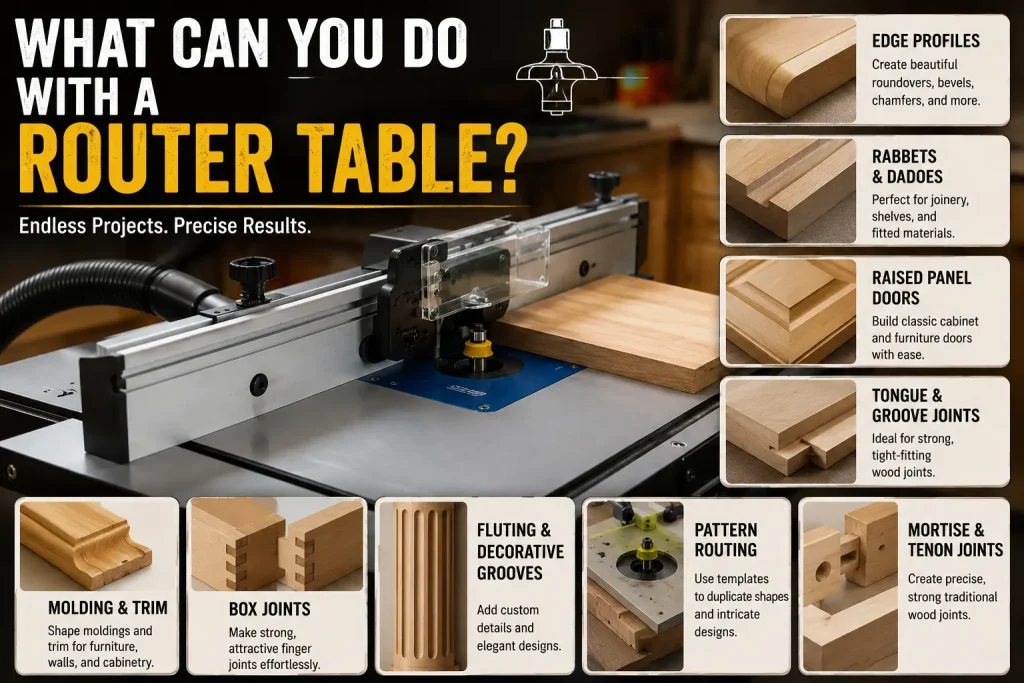
The range of what you can accomplish with a router table will surprise most beginners. Common uses include:
- Cutting decorative edge profiles (roundovers, ogees, chamfers, coves, beads)
- Cutting rabbets, dadoes, and grooves for joinery
- Making raised panel doors for kitchen and furniture work
- Shaping moldings and trim pieces
- Cutting tongue-and-groove joints
- Routing box joints (finger joints)
- Pattern routing and template work
- Making mortise-and-tenon joints
- Creating fluted columns and decorative grooves
Why Use a Router Table Instead of a Handheld Router?
A handheld router is a brilliant tool. But there are many situations where using a router table is simply the better choice. Here’s an honest comparison:
| Situation | Handheld Router | Router Table |
|---|---|---|
| Small workpieces | Difficult — hard to balance | Much easier and safer |
| Long, repeated edge profiles | Tiring; inconsistent | Fast, consistent, effortless |
| Large panels | Better — table supports wood | Hard to maneuver large stock |
| Raised panel doors | Risky and difficult | Standard technique |
| Grooves / dadoes | Requires jigs | Simple fence setup |
| Template / pattern routing | Works well | Works well with bearing bits |
| On-site carpentry | Portable | Not practical |
The bottom line: for shop work, repetitive shaping, and precision joinery, a router table will save you time, frustration, and yield professional results. For large panels or job-site work, a handheld router wins.
Know Your Machine: Router Table Anatomy
Before you turn anything on, learn what each part does. Most router tables share these core components:
The Table Top (Router Table Surface)
The flat work surface — usually made from phenolic resin, MDF, cast iron, or aluminum. A flat, slippery surface is essential. Any warp or wobble in the table will affect cut quality. Look for a table top at least 24″ × 16″ for practical work.
The Router Insert Plate
A removable plate (usually aluminum or phenolic) that drops into the table and holds the router. The hole in the center is where your router bit protrudes. Most plates come with interchangeable rings (called insert rings or bit opening rings) that reduce the gap around the bit — which improves control and dust collection for smaller bits.
The Fence
The fence is the adjustable guide that runs across the table. It controls how much of the bit contacts your workpiece — this is the primary way you set cut depth on a router table. A good fence is straight, easy to adjust, and locks firmly in place. Most fences have two independently adjustable halves (infeed and outfeed sides) for operations like jointing.
The Fence Faces
The vertical surfaces of the fence that your workpiece rides against. They should be smooth and perfectly perpendicular to the table. Many woodworkers attach MDF or hardwood auxiliary faces to their fences for better control on specific cuts.
The Guard / Bit Guard
A shield that sits on the fence or on a separate arm, covering the spinning bit above the workpiece. Always use it. It’s not optional safety theater — it genuinely prevents kickback injuries and keeps chips from flying at your face.
The Miter Gauge Slot
A T-shaped channel machined into the table that accepts a miter gauge (like the one on a table saw). You use this for crosscutting and end-grain routing — operations where you push wood into the bit perpendicular to the fence.
The Router
The motor unit mounted under the table. For router table use, you want a full-size router with at least 1¾ HP (2+ HP is ideal), and it should accept both ¼” and ½” shank bits. Variable speed is important — larger bits need slower speeds. A router with above-the-table height adjustment (a lift mechanism) is a major upgrade that makes bit height changes quick and precise.
Router Bits 101: Choosing the Right Bit
Router bits are the heart of the operation. Choosing the right bit — and using it correctly — makes the difference between a professional result and a frustrating mess.
Shank Sizes: ¼” vs. ½”
Router bits come in two common shank diameters in the US: ¼ inch and ½ inch. For router table work, always use ½” shank bits whenever possible. Here’s why:
- ½” shanks are far more rigid — they vibrate less at high speed
- Less vibration means cleaner cuts and longer bit life
- They’re much less likely to break under heavy cuts
- The bit stays cooler because heat dissipates better through more steel
Only use ¼” shank bits for small profile bits where ½” versions aren’t made.
Carbide vs. HSS Bits
Carbide-tipped bits are the standard choice for router tables. They stay sharp 10–20x longer than high-speed steel (HSS) bits and handle hardwoods effortlessly. Pay a bit more for quality carbide — cheap bits from unknown brands dull quickly and can shatter dangerously.
Common Router Bit Profiles and Their Uses
| Bit Type | What It Does | Best For |
|---|---|---|
| Roundover | Rounds over the edge of the board | Tabletops, furniture edges, handrails |
| Chamfer | Cuts a flat angled bevel on the edge | Modern/contemporary furniture, reducing sharp corners |
| Rabbet | Cuts a step in the edge | Cabinet backs, drawer bottoms, frame-and-panel joinery |
| Straight / Spiral | Cuts flat-bottomed grooves or dadoes | Joinery, dadoes for shelves, box joints |
| Cove | Cuts a concave scoop into the edge | Decorative profiles, moldings |
| Ogee | Classic S-curve profile | Traditional furniture, picture frames, molding |
| Flush Trim | Trims one piece flush with another using a bearing | Template routing, trimming laminates and veneers |
| Raised Panel | Creates the raised center panel profile | Cabinet doors, furniture panels |
| Dovetail | Cuts wedge-shaped grooves | Sliding dovetail joints, T-shaped grooves |
| Core Box | Cuts a rounded groove | Flutes on columns, decorative grooves |
Pro Tip: Start With a Roundover
If you’re brand new to router tables, start with a ½” roundover bit. It’s forgiving, produces beautiful results quickly, and teaches you how the machine handles before you move to more complex profiles.
Router Table Safety: Rules You Can’t Skip
A router table is one of woodworking’s most useful machines — and like any power tool, it demands respect. The bit spins at 10,000–24,000 RPM. A mistake happens in a fraction of a second. Follow these rules every single time.
Personal Protective Equipment (PPE)
- Safety glasses or a face shield — every single time. Chips fly. A face shield is better than glasses alone for router table work.
- Hearing protection — routers are loud (90–100 dB). Prolonged exposure causes permanent hearing loss.
- Dust mask or respirator — fine wood dust is a carcinogen. At minimum, use an N95 mask. A half-face respirator with P100 filters is better.
- No loose clothing, gloves, or jewelry — these can catch in the bit. Tuck in sleeves and remove rings.
Machine Safety Rules
- Always use the guard. Keep the bit guard positioned over the bit at all times during operation.
- Inspect bits before every use. Look for cracks, missing carbide, dull edges, or damaged shafts. Never use a damaged bit.
- Insert bits correctly. Push the bit shank fully into the collet, then pull it back about 1/16″ before tightening. This prevents the bit from “walking” out during use.
- Tighten the collet firmly — but don’t overtighten. Use two wrenches (one on the collet nut, one on the shaft) for proper tightening without stressing the bearings.
- Never change bits with the router plugged in. Unplug it or use the switch lockout. Every time.
- Allow the bit to reach full speed before feeding wood. A laboring bit is a dangerous bit.
- Never leave the machine running unattended.
- Keep your hands away from the bit path. Use push sticks, featherboards, and push blocks to keep fingers away from the cutting zone.
Kickback Prevention
Kickback is when the bit grabs the wood and violently throws it back at you (or toward your hands). It’s the most common router table hazard. Prevent it by:
- Always feeding wood in the correct direction (right to left, against bit rotation — covered in Section 7)
- Using featherboards to keep wood pressed firmly against the fence
- Never making climb cuts (feeding wood in the same direction as bit rotation) unless you’re an experienced woodworker doing it for a specific reason
- Taking multiple shallow passes rather than one deep cut
Depth of Cut Rule
For most profiles, never remove more than ⅛” of material in a single pass. Make multiple passes, raising the bit incrementally, until you reach full depth. Aggressive single-pass cuts are the leading cause of kickback and poor cut quality.
How to Set Up a Router Table Step by Step
Proper setup is what separates professional-quality results from frustrating, inconsistent ones. Never rush this stage.
Step 1 — Choose and Install Your Router Bit
- Unplug the router (or engage the power switch lockout).
- Select the correct bit for your operation.
- Clean the shank and collet with a dry cloth — oil, sawdust, or resin residue causes slipping.
- Insert the bit shank fully into the collet, then withdraw it about 1/16″. This ensures the entire collet grips the shank evenly.
- Tighten the collet nut firmly with two wrenches. Most routers require 15–20 ft-lbs of torque — firm, but not gorilla-tight.
Step 2 — Choose the Right Insert Ring
Select the insert ring (bit opening ring) that most closely surrounds your bit without touching it. A smaller ring opening reduces tear-out on the workpiece underside and improves dust collection. Most plates come with rings in ¾”, 1½”, 2¼”, and larger sizes.
Step 3 — Set the Bit Height
Bit height determines how deep or how much of the profile the bit cuts into your workpiece. Here’s how to set it accurately:
- Use a ruler, a dedicated router setup block, or a combination square to measure bit height above the table surface.
- For edge profiles, make test cuts on scrap wood of the same thickness as your project stock.
- Adjust in small increments. Most router lifts adjust in 1/64″ or 1/32″ increments.
- For bearing-guided bits, the bearing controls the cut depth — your job is only to set the height for aesthetic profile placement.
Pro Tip: Always Test on Scrap First
Never make your first pass on project wood. Always cut a test piece from the same species and thickness as your workpiece. Router bits cut differently in oak than in pine — always verify your setup.
Step 4 — Set and Lock the Fence
- For bits with a bearing (like roundover, flush trim, or rabbet bits), the bearing controls depth — set the fence flush with or slightly behind the bearing’s outer edge.
- For non-bearing bits (straight bits, slot cutters), the fence controls how much of the bit contacts the wood. Adjust the fence position to expose the desired amount of bit.
- Check fence alignment with a reliable straightedge — make sure both fence halves are perfectly co-planar.
- Lock both fence-securing knobs firmly. A fence that moves mid-cut ruins the workpiece and can be dangerous.
Step 5 — Install Featherboards
A featherboard is a spring-loaded device that presses your workpiece firmly against the fence and table surface, preventing it from lifting or wandering. Use at least one featherboard pressing the stock against the fence. For tall or heavy stock, add a second pressing down on the table surface. Featherboards are one of the most important safety accessories for router table work — don’t skip them.
Step 6 — Connect Dust Collection
Router tables produce enormous amounts of fine dust. Connect your dust collector or shop vacuum to the fence’s dust port before you start. Seal the gap around the bit opening with the correct insert ring. Good dust collection keeps your shop air breathable and your work surface visible.
Step 7 — Do a Dry Run
With the router OFF, walk the workpiece through the cut path from start to finish. Check that your hands stay clear of the bit, the workpiece moves smoothly against the fence, and you have enough room at the end of the cut to complete it safely. Plan your push stick and push block positions before you turn anything on.
Feed Direction: The Rule That Keeps You Safe
This is one of the most critical concepts in router table use — and one that many beginner guides explain poorly. Get this wrong, and you risk serious kickback.
The Standard Feed Direction
When using the fence, feed the workpiece from right to left — that is, from your right side to your left side across the table. This means you’re feeding the wood against the rotation of the bit. The bit’s cutting edges are moving toward you on the front of the bit — so you push wood into them from the right, and they push the waste away to the left.
How to Remember Feed Direction
- Stand at the front of the router table, facing the fence.
- The bit spins counterclockwise when viewed from above.
- Feed direction is right to left when routing the front edge.
- Feed direction is left to right when routing the back edge.
- Rule of thumb: feed so the bit is cutting into the wood, not with it.
What Is a Climb Cut? (And When Should You Do One?)
A climb cut feeds wood in the same direction as bit rotation. This is done by experienced woodworkers in specific situations — usually to prevent tear-out on highly figured wood. Climb cuts are dangerous because the bit can pull the wood aggressively. If you’re a beginner, don’t do climb cuts. If you must, take extremely light passes and maintain a firm grip.
Core Router Table Techniques
Routing a Full Edge Profile
This is the most common router table operation — shaping the edge of a board with a decorative profile like a roundover, ogee, or chamfer.
- Set up the router table as described in Section 6.
- Start the router and let it reach full speed (2–3 seconds).
- Place the workpiece on the infeed side of the table (your right), hold it firmly against the fence, and advance it smoothly into the bit.
- Maintain consistent downward and lateral pressure against the fence throughout the pass.
- Continue pushing the workpiece all the way past the bit until it clears the outfeed side completely.
- Turn off the router before reaching into the table area.
Pro Tip: Routing Order for Minimizing Tear-Out
When routing all four edges of a board, route the end grain (short edges) first, then the long grain edges. Any tear-out that occurs at the end-grain corners gets cleaned up when you route the long edges. This simple sequence eliminates a common frustration for beginners.
Cutting Rabbets
A rabbet is a step cut along the edge of a board — essential for cabinet backs, drawer bottoms, and picture frames. To cut a rabbet using a router table:
- Use a straight bit or a dedicated rabbet bit with a bearing
- Set bit height to the desired rabbet depth
- Set fence position to control rabbet width
- Make multiple passes if depth exceeds ⅛” in a single bite
Cutting Dadoes and Grooves
Dadoes run cross-grain; grooves run with the grain. Both are flat-bottomed channels cut into the face of a board. Use a straight bit (spiral bits leave cleaner walls) and the fence or miter gauge depending on the cut direction.
Routing End Grain (With a Miter Gauge or Sled)
End-grain routing — like cutting profiles on the ends of boards — requires the miter gauge or a dedicated crosscut sled. Never freehand end-grain cuts. The miter gauge runs in the table’s T-slot and provides the backing support that prevents blow-out and keeps the cut square.
Template / Pattern Routing
Attach a template (usually ¼” or ½” MDF cut to your desired shape) to your workpiece with double-sided tape or toggle clamps. Use a flush-trim bit or a pattern bit with a top-mounted bearing. The bearing rides along the template edge, and the bit cuts the workpiece to match the template exactly. This is how woodworkers reproduce curved or complex shapes with perfect consistency.
Advanced Techniques Beginners Often Miss
Most router table guides stop after the basics. Here’s what they leave out — techniques that will significantly improve your results from day one.
Using a Starting Pin for Freehand Curved Cuts
When using a bearing-guided bit without the fence (for template routing or shaped pieces), you need a starting pin. This is a small steel post in the table near the bit. You begin the cut by pivoting the workpiece against the starting pin, then gradually rotate it into the spinning bit. Without the starting pin, the bit can grab the workpiece violently at the start of the cut.
Setting the Outfeed Fence for Full-Width Cuts (Split Fence Technique)
When routing the full edge of a board (removing the entire edge rather than just profiling it), you need to shift the outfeed half of the fence slightly forward — typically equal to the material being removed. This supports the workpiece as it exits the bit, just like a jointer’s outfeed table. Without this adjustment, the workpiece will tip into the bit at the end of the cut.
Featherboard Stacking
For narrow or tall workpieces, use two featherboards: one pressing the wood against the fence horizontally, and one on the fence itself pressing the wood down onto the table. This “two-axis” hold-down system all but eliminates chatter and vibration during the cut.
Dialing In Bit Height With a Setup Block
Router setup blocks are stepped aluminum or brass gauges that let you set bit height to a precise measurement in seconds, without rulers or trial cuts. They’re inexpensive and will save you a lot of scrap wood. Serious router table users consider them essential.
Using a Router Table Fence as a Jointer
With a straight bit and the split-fence technique, you can use your router table to straighten and square the edges of boards — functioning like a small jointer. Offset the outfeed fence by the amount you want to remove (typically 1/32″–1/16″), set bit height to just above the table, and pass the board through. This is a genuinely useful technique when your jointer isn’t available or when you need to joint a specific material.
Climb Cutting for Figured Wood
On highly figured hardwoods like curly maple or bird’s eye, conventional feed direction can cause bad tear-out. An extremely light climb cut pass (taking off just 1/64″ or less) made with both hands firmly controlling the wood can pre-sever the wood fibers and allow the final conventional pass to come out clean. Only attempt this after you’re comfortable with standard router table techniques.
Box Joint Jig on the Router Table
Box joints (finger joints) are strong, attractive corner joints. You can cut them on the router table using a shop-made or commercial box joint jig that rides in the miter slot. The jig indexes each successive cut with a guide pin, producing perfectly even fingers. This is a more approachable technique than it sounds, and the results look spectacular.
Troubleshooting Common Router Table Problems
| Problem | Likely Cause | Fix |
|---|---|---|
| Chipping or tear-out on the surface | Feeding too fast; dull bit; wrong grain direction | Slow your feed rate; sharpen or replace bit; rout end grain first |
| Burning on the wood surface | Feeding too slowly; bit is dull; RPM too high for bit size | Feed faster; replace bit; reduce router speed |
| Wavy, inconsistent cut | Fence moving during cut; inconsistent feed pressure | Lock fence more securely; maintain even feed speed; use featherboards |
| Bit slipping down mid-cut | Collet not tightened properly; bit inserted incorrectly | Re-install bit with 1/16″ gap; tighten collet firmly |
| Profile doesn’t match the bit shape | Bit height incorrect; fence not aligned with bearing | Readjust bit height; align fence with bearing outer edge |
| Vibration and chatter | Unbalanced bit; loose insert plate; loose router in mount | Check and tighten all connections; replace damaged bit; check insert plate fit |
| Workpiece tipping at end of cut | Outfeed fence not offset for full-edge cuts | Apply split-fence technique (offset outfeed fence forward) |
Router Table Maintenance
A well-maintained router table performs better and lasts longer. Here’s what to do and when.
After Every Session
- Blow off or vacuum the table surface, fence, and insert plate
- Wipe the table top with a clean cloth to remove dust and resin residue
- Apply a coat of paste wax or a dedicated table surface lubricant (like TopCote) — this keeps wood gliding smoothly and prevents rust on cast iron tops
- Store bits in a dedicated case or rack — never let them rattle against each other
Monthly
- Check the router collet for wear and debris — clean it with a brass brush
- Inspect router bit bearings: spin them by hand; they should rotate smoothly with no grinding or wobble
- Check fence alignment with a reliable straightedge
- Verify that the insert plate sits flush with the table surface — adjust leveling screws if needed
Annually
- Replace the router collet if it shows wear, scoring, or difficulty releasing bits
- Inspect and clean the router’s base and height-adjustment mechanism
- Apply a light oil to any router lift mechanisms
- Inventory your bits and dispose of any that are dull, chipped, or cracked
Extend Bit Life With These Habits
Clean resin buildup off router bits with a dedicated bit cleaning solution (or oven cleaner on a shop rag). Resin makes bits cut hot and dull faster than normal use. Clean bits after every few sessions.
Frequently Asked Questions
What size router do I need for a router table?
At minimum, use a router with 1¾ HP. For serious work — especially raised panels and large profile bits — you want 2–3+ HP. The router should accept both ¼” and ½” shank collets and have variable speed control. Fixed-base routers work fine for router tables, but plunge routers with the plunge mechanism locked are also commonly used.
What RPM should I use for different router bits?
Larger bits need slower speeds to keep tip speed safe and manageable. As a general rule: small bits (up to 1″ diameter) run at 22,000–24,000 RPM; medium bits (1″–2″) at 18,000–22,000 RPM; large bits (2″–2½”) at 12,000–16,000 RPM; large panel-raising bits (2½”+) at 10,000–12,000 RPM. Always consult the bit manufacturer’s recommendation.
Can I use a router table without a fence?
Yes — for bearing-guided bits, you can remove the fence and use the bearing against the workpiece edge directly. However, always use a starting pin when doing freehand passes, and only work without the fence when you have a specific reason to do so. The fence is your primary safety system for most cuts.
How deep should I cut in one pass?
For most work, limit each pass to ⅛” or less of material removal. For large profile bits or hard materials like oak or maple, take even lighter passes — sometimes 1/16″ or less. Multiple light passes produce better surface quality, reduce tear-out, and prevent dangerous kickback. The final pass is often a very light “finishing pass” that removes the tool marks from deeper cuts.
Do I need a router lift?
A router lift is not required, but it makes a significant quality-of-life difference. Without a lift, you adjust bit height by reaching under the table and turning the router’s depth adjustment — awkward and imprecise. A router lift gives you a handle on top of the table and often a threaded mechanism for precise, repeatable adjustments. If you plan to use your router table regularly, a lift is worth the investment.
How do I prevent tear-out on the exit side of the cut?
Use a backer board — a piece of scrap wood pressed tightly behind your workpiece, especially on end-grain cuts. The backer supports the fibers as the bit exits, preventing the classic blow-out on the trailing edge. Also, making a very light scoring pass at full height before the final cut helps on figured or difficult wood species.
Is a router table worth it for a beginner?
Absolutely. A router table is often one of the first major tools serious beginners add to their shop. It makes operations that are difficult or dangerous with a handheld router — like profiling small pieces, cutting raised panels, or making repetitive mortises — safe, repeatable, and even enjoyable. Entry-level benchtop router tables are available for under $150 and do excellent work.
Conclusion
A router table is one of the most useful tools for improving accuracy, control, and consistency in woodworking. Once you understand the basics — safe setup, correct feed direction, and proper bit selection — it becomes much easier to create clean edges, strong joinery, and professional-looking results. Start with simple projects, take light passes, and practice regularly. With time and experience, a router table can become one of the most valuable tools in your workshop.
You May Also Like It:
Basic Coding Concepts – Beginners Guide
Simple Coding Projects for Beginners
Huffman Coding – The Core of Data Compression Explained
